
This article explains how to get your AWD Volvo system to last for well over 100,000 miles. If you’re reading this with more than 150k miles on your car and you haven’t “done anything” to prolong the life of the AWD system, you’ve probably taken good care of your driveshaft. For example, it can be achieved by keeping all four of the same brand and tread depth tires on your car (for first-generation AWD Volvos). However, if you hear chirps or a bumping sound when you accelerate, the joint failure will progress to a vibration as the balls wear down and the joint becomes dry. There is a good chance that you will have to replace the entire shaft assembly, or at the very least the front joint, if the driveshaft from the angle gear to the viscous coupling has not had its CV joints lubricated every 100K miles.
Driveshaft tips and precautions
There is a good chance that you will have to replace the entire shaft assembly, or at the very least the front joint, if it is available, or if the driveshaft from the angle gear to the viscous coupling has not had its CV joints lubricated every 100K miles. Maintaining the driveshaft of a Volvo C30 is not difficult and there are safety measures.
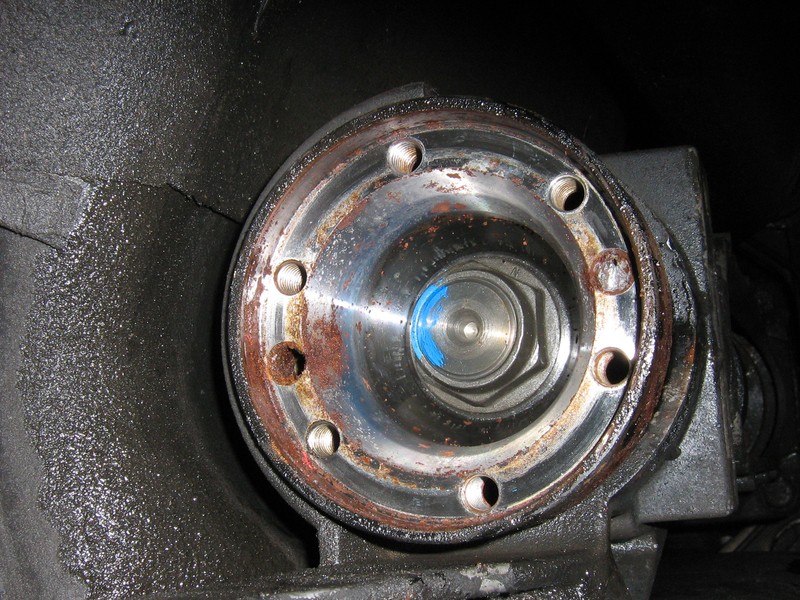
- Lift the car safely, leaving enough space underneath for maintenance in the front and back. The 6mm hex cap screws holding CV joints to the flanges at both ends need to be cleaned out. The bit will not go deep enough into the cavity to prevent stripping bolts because dirt builds up there!
- Take off the back strap beneath the driveshaft.
- At the front and rear CV joints, remove the six bolts. Balance bolts might be present on the earliest models in this series. This can be seen by looking at some of the bolt threads that are a few millimeters through the flange.
- If this is discovered, you must label the CV joint to flange, remove the bolts, and store them in a way that allows them to be returned to their original location. We recommend making the map of the bolt location on a piece of cardboard with the numbers 1 through 6 arranged in a circle. Insert the bolt next to the number and use your mark as a reference.
- In order to facilitate the driveshaft’s withdrawal, remove the exhaust pipe brackets from the rear axle area.
- There is a bracket with two bolts on each side that is fastened to the floor at the driveshaft’s midpoint. Two bolts, located above the exhaust pipe, secure the support bearing carrier to the main bracket.
- Take out the two bolts. As the bearing will be lower, it will pass by the heat shielding more easily. We think it is easier to remove the four bolts on the main bracket. It’s not necessary to remove the bracket entirely.
- Watch your fingers when removing the shaft! It may be much easier to tie the exhaust pipe over with wire once the shaft slides out the back.
- Prevent the shaft from swaying and jostling. Although the center joint has a sort of bumper, it can be damaged by rough handling.
- After removal, arrange newspaper or other material on a long table or the floor, placing it where each joint is.
- Repacking the joints on ends is simple. A small hammer and a drift will work well enough to tap off a cap from the end of the joint.
- The irregularly shaped cap seal and dried grease caked inside are probably what’s inside. There’s a chance the seal is misplaced. It is not advisable that you attempt to clean it with a solvent. Solvent residue can contaminate newly applied grease. After excavating everything that is easily accessible, pack the joint with CV joint grease and put on a latex or nitrile glove.
- Most auto supply stores do this, but you usually have to ask. It will be packaged like a big catch-up package or as a squeeze tube. Three ounces per CV joint seems sufficient.
- Take a small amount of grease in the palm of the glove, cup the palm over the joint, and press. After that, clean the end up and install the rubber seal around the CV joint at the ridge, making sure the humps are positioned inside the bolt’s passageway.
- To ensure that the bolts can pass through for future flange installation, tap the cap back on while leaving a bolt in one of the holes.
- Repeat on the opposite end.
- Now clean the center joint bolts and mark the center joint to that flange, In order to ensure that you put it back the way you found it. Since the shaft is balanced as a whole, adjusting it could cause vibrations.
- After holding the shaft and removing the bolts, tap the CV joint out of the flange and perform normal maintenance.
- In two steps, the bolts securing the shaft and the CV joints to the flanges of the angle gear and AOC tighten to 20 ft-lbs.
- Every bolt is first turned to 7.5 foot-lbs, and subsequently to 20 foot-lbs.